
Introduction
Finding, filtering, and carrying enough water is the most stressful part of a first trip. You want to push further into the wilderness, but the fear of running dry can keep you tethered to civilization. I promise that by the end of this guide, you will master the ultimate water system bikepacking lessons learned over thousands of miles. We will dive into the essential bikepacking gear list for hydration and the bikepacking navigation tricks used to find hidden springs.
Key Takeaways
-
Redundancy is Vital: Never rely on a single water container or filter.
-
Capacity vs. Weight: Balance your carrying capacity with the distance between sources.
-
Pre-Filtering: Save your expensive filters by using a “pre-filter” for sediment.
-
Storage Logic: Distribute water weight low on the frame to maintain bike handling.
1. The Rule of Redundancy
If there is one thing a beginner bikepacking enthusiast should know, it’s that one is none. If your only water bladder leaks in the desert, you are in immediate danger. Always split your capacity between a bladder, a hard bottle, and a collapsible “dirty” bag for filtering.
2. Weight Distribution and Handling
Water is heavy—specifically, 1 kilogram per liter. Carrying three liters on your back in a heavy pack will lead to saddle sores and back pain.
Pro Tip: Go Low
Mount your heaviest water storage on the underside of your down tube or in a frame bag. Keeping the weight near the bottom bracket ensures your bike remains stable on technical descents.
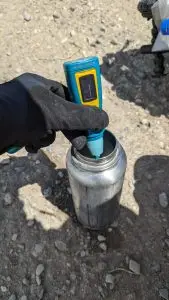
3. The Best Filters for Bikepacking
Your bikepacking gear list must include a reliable filtration method. The most popular options for beginners include:
- Hollow Fiber Filters (e.g., Sawyer Squeeze): Fast, light, and easy to use.
- UV Purifiers: Great for clear water, but they don’t remove “floaties.”
- Chemical Tabs: Perfect as a lightweight backup in your repair kit.
4. Understanding Water Sources via Navigation
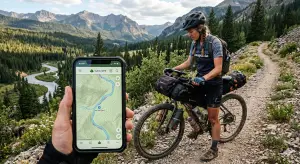
Good bikepacking navigation isn’t just about the trail; it’s about finding blue lines on the map. Use apps like Gaia GPS or Topo Maps to identify reliable creeks versus seasonal washes. Always read recent trip reports on Comment/Discussion sections of route apps to see if “reliable” springs have dried up.
5. The “Pre-Filter” Technique
One of the best water system bikepacking lessons learned is how to handle murky water. If you pump directly from a silty puddle, you will clog your filter in seconds.
- The Hack: Wrap a buff or a coffee filter around the intake or the mouth of your collection bag. This catches the large sediment and extends your filter’s life.
6. Managing “Dirty” vs. “Clean” Containers
Cross-contamination is a trip-ender. Clearly mark your bags. Use a dedicated “dirty bag” to scoop water from the stream, and only ever let filtered water touch your “clean” bottles. Use a permanent marker to write “DIRTY” in big letters on your collection bladder.
7. Storage Solutions for Every Frame
Every bike frame is different. If your frame is too small for large bottles, look into:
- Cranktank: A specialized tank that sits in the “V” of your frame.
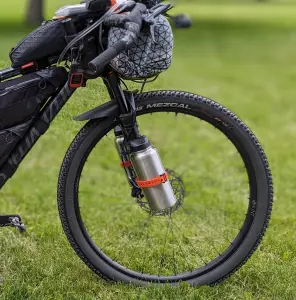
- Fork Cages: Oversized cages that hold 1.5L bottles on your fork legs.
- Stem Bags: Perfect for a quick-access 0.5L bottle while riding.
8. Cold Weather Hydration
If you are beginner bikepacking in the winter, remember that filters can freeze. If the water inside the tiny tubes of a Sawyer filter freezes, it expands and breaks the internal seal.
Expert Insight: Sleep with your filter in your sleeping bag at night to keep it from freezing and becoming useless. Note: make sure it’s in a waterproof container so it doesn’t leak in your sleeping bag.
9. Electrolytes: More Than Just Water
Drinking massive amounts of plain water can flush out your salt levels, leading to hyponatremia. Always carry electrolyte tabs or powder. This is especially critical on high-mileage days where you are sweating constantly under the sun.
10. The “Last Fill” Strategy
Before you head into a dry stretch or to your final campsite, fill every container you have. You need water for drinking, but also for rehydrating your dinner and your morning coffee. Never roll into a “dry camp” with less than two liters of water.
FAQ
Q: How much water should a beginner carry?
A: A good rule of thumb is to have the capacity for 3 to 4 liters, though you may not always fill it to the max if water is frequent.
Q: Can I just use iodine tablets?
A: Yes, but they take 30 minutes to work and don’t remove sediment. They are best used as a backup to a mechanical filter.
Q: Is it okay to drink from a mountain stream without filtering?
A: No. Even the clearest water can contain Giardia or Cryptosporidium from animal waste. Always filter.
Don’t Get Stuck Thirsty
Mastering your water system is the key to confidence in the backcountry. Once you know you can find and treat water, the whole map opens up to you.
My YouTube video on my water system can be found here https://youtu.be/MZ8K0sCHHpk.
Partner page and gear reviews. https://thrurider.bike/bikepacking-gear-reviews/